
I wanted to post a bunch of pictures of projects that I was working on right before our big Independence Day party. So, first:
THE BAR
This project began on May 6, when my mother and I went shopping for a dresser. While at Sam Levitz (furniture store), we walked through the clearance section. Sitting in the back of the store (this area was far more 'warehouse' than store), we saw this gem:
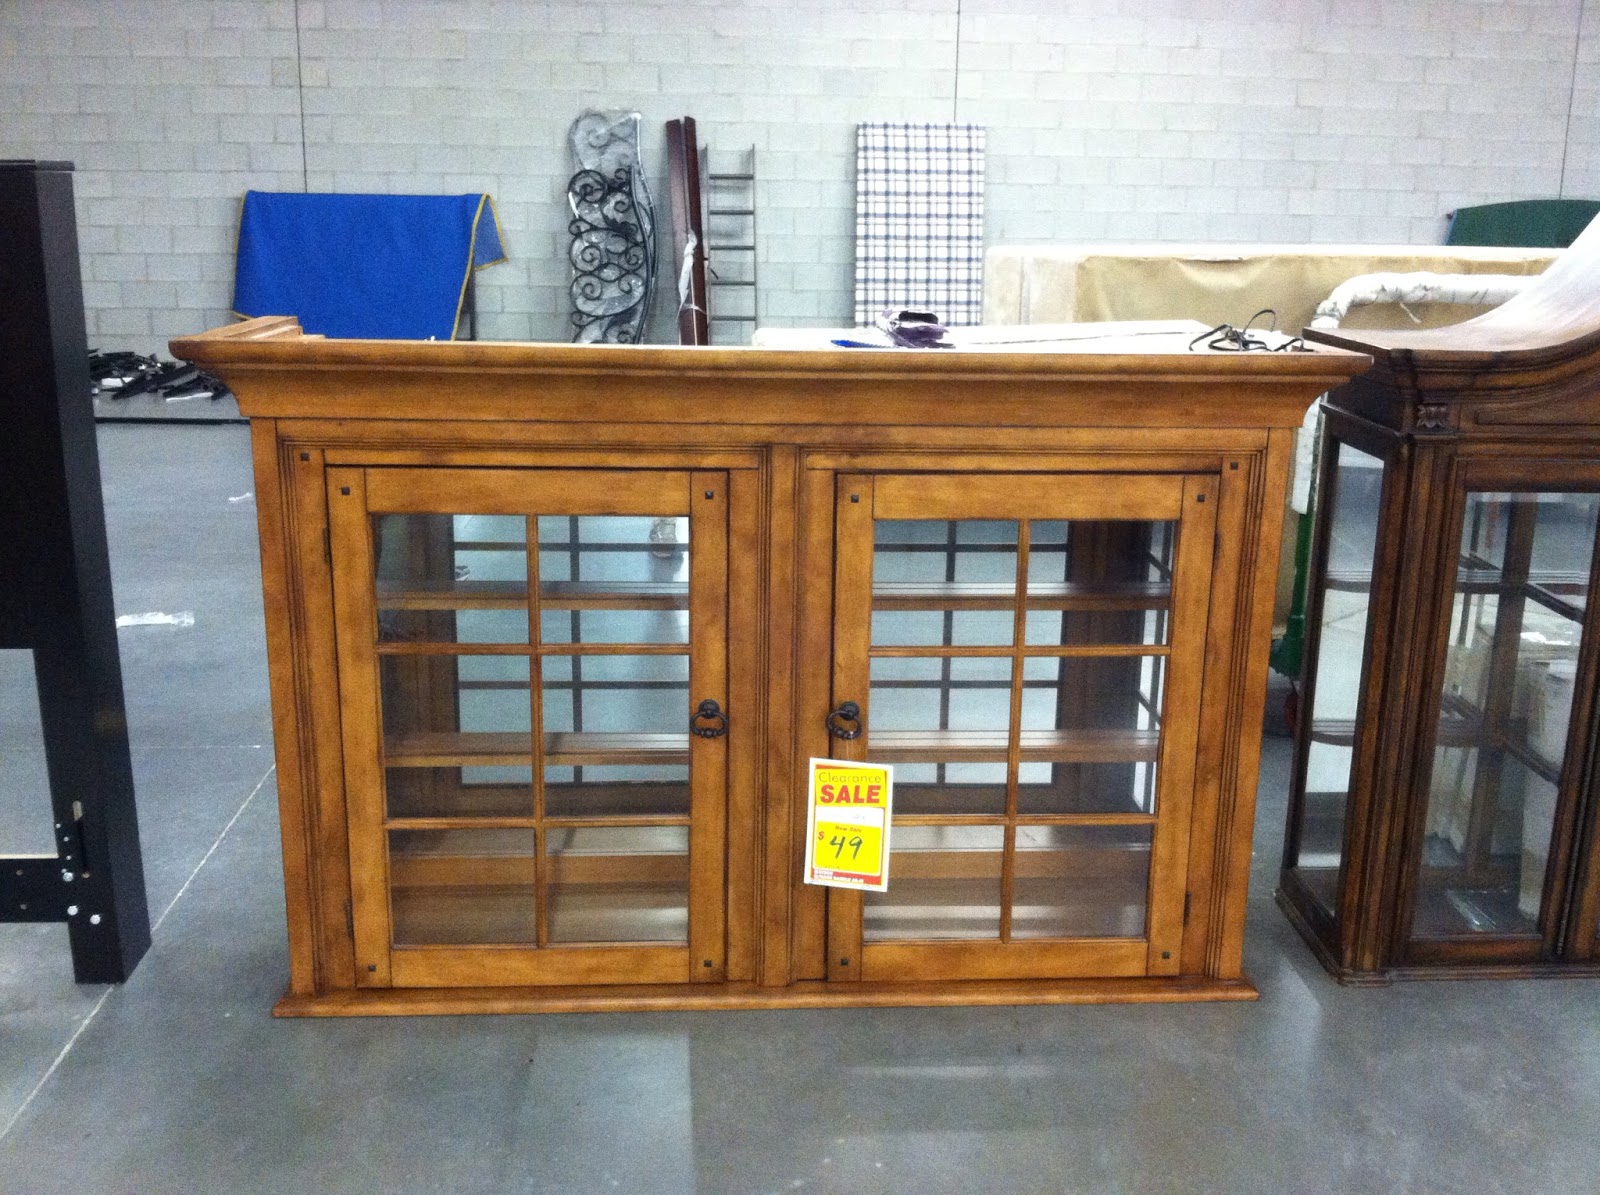
It's the top portion of a china cabinet. It lights up (when plugged in). It has 4 glass shelves and a glass background. It was made of REAL WOOD. It was $50.
It was PERFECT to be made into a bar/drink cabinet. Per Pinspiration, I had wanted to remake an armoire into a bar - and this seemed...better...and available...and cheaper than the armoires being sold at the Habistore or Tucson's plethora of thrift shops. :)
Since it was the top of a china cabinet, the "top" of the cabinet was unfinished. We would need to make a bar top. No problem! We're a 4-H family! We LOVE projects!
That day, while Mom and I were in Hobby Lobby (one finally opened in Tucson at the end of March - and this was my first time; it was like coming home), we ran into a very friendly woman, who had just finished tiling a tabletop. She gave us a lot of ideas (ceramic tile & silicone) and thought it would be no problem for us to finish this. My mom really wanted to get the project finished while they were here - but they only had one day left to their stay.
A couple weeks later, Dan and I headed to Lowe's to buy tiles, plywood, and the adhesive. I think we spent about 2.5 hours in Lowe's...the most we'd ever spent there in one trip. This is a view of the tile layout from the top. The large tiles are marble, 12"x12" tiles - they were about $1 or 1.49/tile. I thought this was a STEAL and would make the bar look classy. The marble is surrounded by 2"x6" white ceramic tile (sometimes referred to as 'subway' tile, I believe). Along the long-side, there are tan, glass tiles that are 1/2"x6". On the shorter side, there are 2"x4" tan, glass tiles. FYI - should you decide to do this someday, glass tiles are the most expensive.
 |
| As you can see, we had to cut 2 ceramic tiles. Lowe's will do this. |

We decided to add wheels to the bar for several reasons 1) the 'cabinet' is heavy; 2) adding tile would make it even heavier; so, wheels will make this puppy much easier to move.


After finding the tile, it was time to get plywood cut. We met an overly "helpful" associate who said we should NOT use silicone to secure the tiles, but some crazy stuff called "kwik-set" that we could use to build up the grout-stuff to ensure the tile would be the same height.
 |
| Adding plywood shims to support the plywood base and tile-top. |

After the shims were added, we took a couple weeks off from the project because Dan was in Qatar. I thought about attempting this on my own...and then didn't. :)
So, on mega-project weekend, we got to work. Dan secured the plywood - and then, we mixed up the quick-set stuff...and put on our brick-laying hats.

 |
| Red Solo Cup: not just for Toby Keith or college parties. |
 |
| The tiles secured! |

Here is the bar in its home, complete with another Pinterest-inspired project (ENJOY).
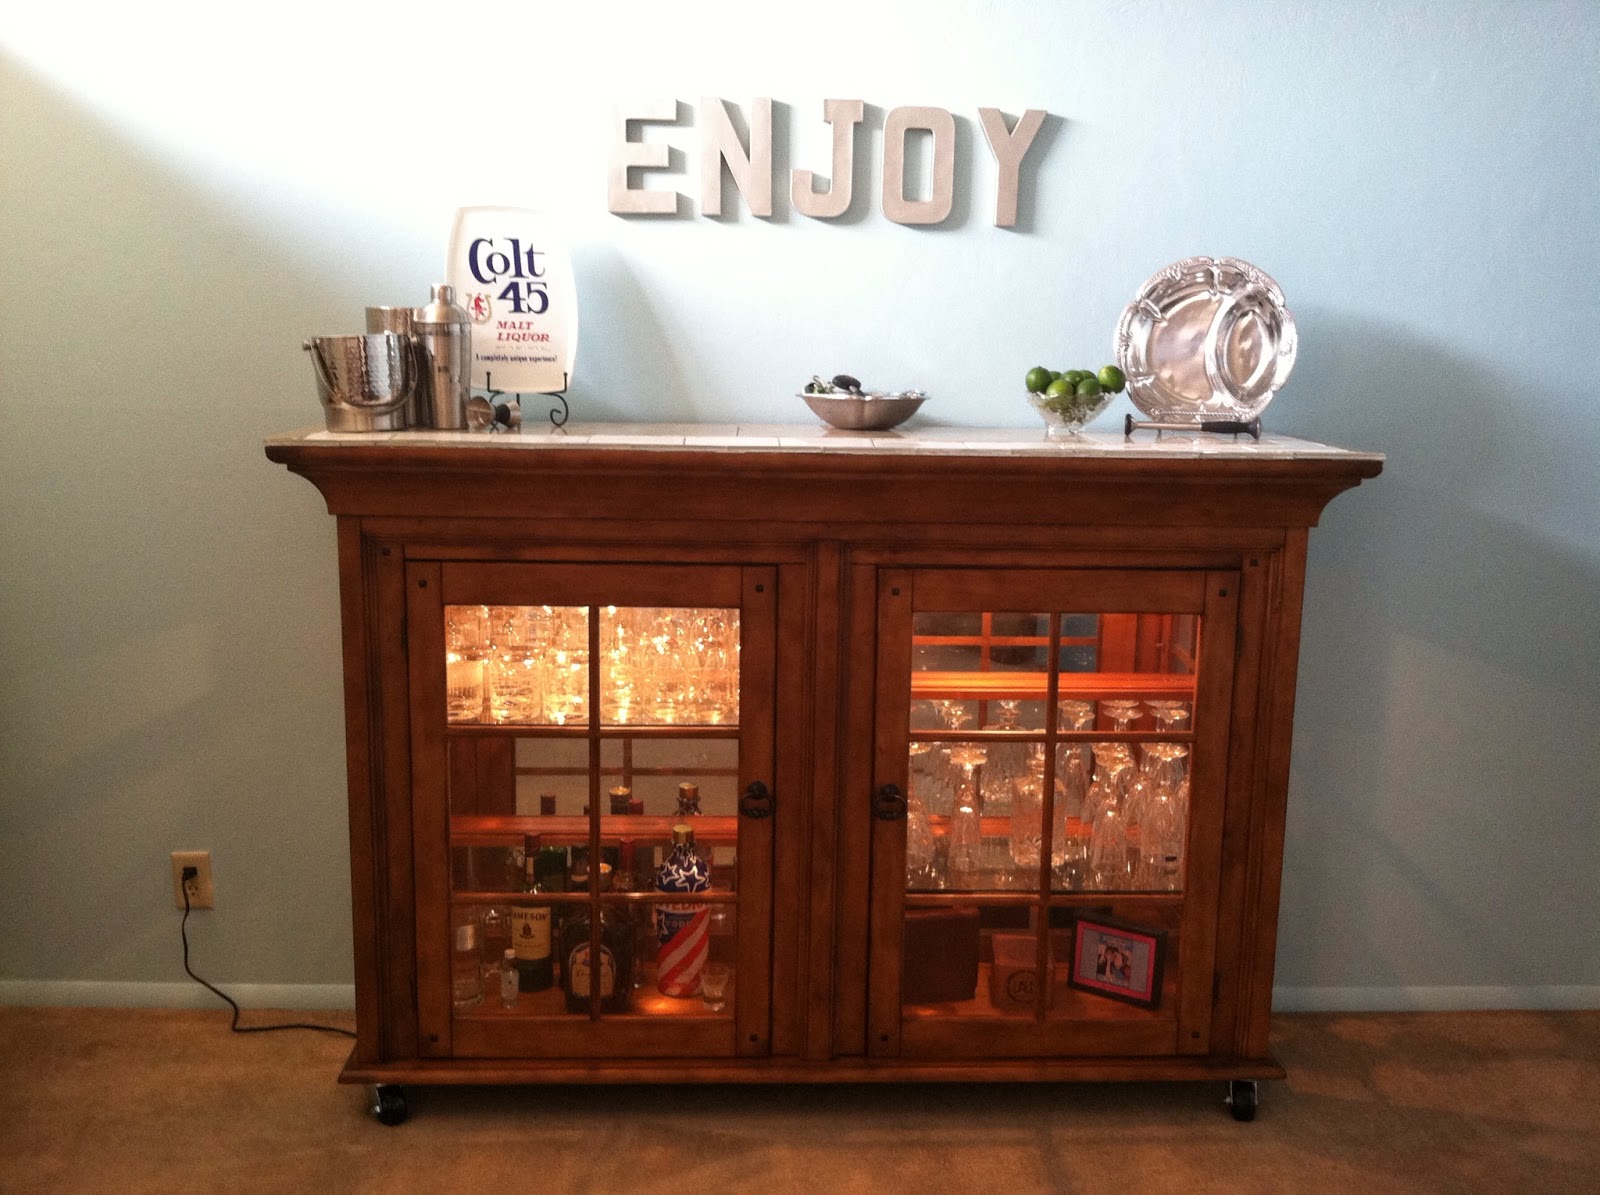
The letters are 3D cardboard letters from Hobby Lobby that have been spray-painted with a satin-nickel finish. The letters were mounted with squares from 3M. (Also, the O and Y are now even with the other letters.)

1 comment:
ENJOY - why, we will sometime, thanks.
Post a Comment